and our friendly staff will help you determine the most appropriate cleaning service for you.
Choose Any Service
July 12, 2023
Moving out and starting a new chapter? It's an exciting time to envision a fresh living space that meets your evolving needs. Yet, there's one essential task to tackle before you leave: end-of-tenancy cleaning. It's crucial for a smooth transition and securing the return of your full deposit. Ensuring your apartment is spotless not only paves the way for a hassle-free move but also protects your financial interests.
Hiring professional end-of-tenancy cleaning services is without a doubt one of the most simple, effortless, and time-saving ways to attain a completely clean space. The specialist cleaners can thoroughly clean your apartment, guaranteeing that you receive your entire deposit back.
However, if you're determined to take on this challenge independently, it is essential to be well-prepared and equipped with a carefully devised strategy. For your convenience, we've developed this ultimate apartment cleaning checklist that will walk you through every single step of this vital process. So, we encourage you to continue reading!
Why is it important to clean your apartment when moving out?
Giving your apartment a proper cleaning is an essential step of the moving-out process. After all, it will give you the peace of mind that you will receive your deposit money back. When you initially rented the apartment, you likely handed over a significant amount as a security deposit to the landlord or property management company.
Failing to leave the apartment tidy and neat could result in the withholding of a portion or the entire deposit. Not to mention that it could lead to a negative reference from your landlord, which might hinder your ability to secure future rentals. Keep in mind that many landlords request references from previous landlords to evaluate a tenant's suitability.
So, cleaning your apartment when moving out is not only a practical requirement but also a matter of respect, responsibility, and consideration for others. It comes with advantages to both you and the property owner and contributes to a positive rental experience for everyone involved. If you feel unsure about handling the task effectively or find yourself lacking the time, consider seeking help from a professional cleaning company.
Apartment move-out cleaning: Where to start from?
Before diving into the cleaning process, it's wise to first check your rental agreement for any specific cleaning requirements or guidelines you should adhere to. Once you have familiarized yourself with the terms, create a detailed apartment cleaning checklist that outlines all the tasks you need to complete.
Think about what you need to clean in every room in your apartment, for example, walls, windows, baseboards, carpets, etc. Though the moving-out cleaning process may appear daunting, if you've maintained a proper cleaning schedule before, accomplishing it on your own won't be too challenging.
Once you made your cleaning checklist it is time to grab your cleaning supplies and tools and start tackling each room. Always adopt a top-to-bottom approach, starting with the ceilings and walls and working your way down to the floors.
Room-by-room apartment cleaning checklist
Here, we will provide you with the ultimate apartment cleaning checklist starting with common areas such as the kitchen and living room, and moving to the serene spaces of the bedroom and bathroom.
Kitchen cleaning checklist
The kitchen stands as one of the most demanding rooms to clean. It is not surprising considering its constant usage in any household. Since it is used for cooking and food preparation, this place often accumulates grease and tough stains that require extra effort to be removed. Moreover, the diversity of surfaces and appliances in the kitchen demands specific cleaning supplies and approaches, further adding to the complexity of the task. Here is a simple checklist that will empower you to provide your kitchen with the thorough deep cleaning it requires.
Ceiling and walls. To begin, take down all wall-mounted items like shelves and picture frames. Next, use a microfiber cloth to get rid of any dirt, cobwebs, or dust that might have accumulated on the ceilings and walls. If there are any stains or grease you may clean them with a soft cloth and a mixture of warm water and mild dish soap. Don't overlook the importance of cleaning light fixtures and switches as well, as these areas often collect dust and grime.
Windows and frames. Employ a glass cleaner and a lint-free cloth to wash the windows and banish dirt and dust effectively. Don't forget to give attention to the window frame, sills, handles, and tracks by thoroughly dusting them off.
Kitchen cabinets, drawers and shelves. Start by clearing out your cabinets, shelves, and pantries, discarding any unnecessary items or expired foods. Then take a damp cloth and wipe down all exterior and interior of your cabinets, including the handles and top of high surfaces. If there are any stubborn stains or grease utilize a suitable cleaner to tackle them effectively.
Countertops and backsplashes. To clean counters and backsplashes you can simply use damp microfiber cloths or a paper towel. Using a ready-to-use cleaner is a convenient option, too. However, it's crucial to select a cleaner that matches the material of your countertops to ensure the best results and proper care.
Kitchen appliances. First, make sure that all of the appliances are turned off. Then, bravely tackle the dirty work of cleaning each appliance one by one. Thoroughly wipe down the outside and inside of the dishwasher and microwave with care. For your refrigerator, remove all shelves, drawers, and racks and wash them using warm, soapy water. Treat the oven racks the same way. When it comes to cleaning the interior and exterior of your oven, it would be best to use a cleaner specifically designed for ovens. Remember to include the cleaning of other small appliances, such as the coffee machine or electric kettle, in your tasks as well.
Sink, faucet and fixtures. Clear away any dirty dishes and debris left in your sink, and then give it a thorough cleaning using a mild detergent. Pay attention to removing any limescale buildup and water spots from the faucet and fixtures to restore a sparkling, fresh appearance.
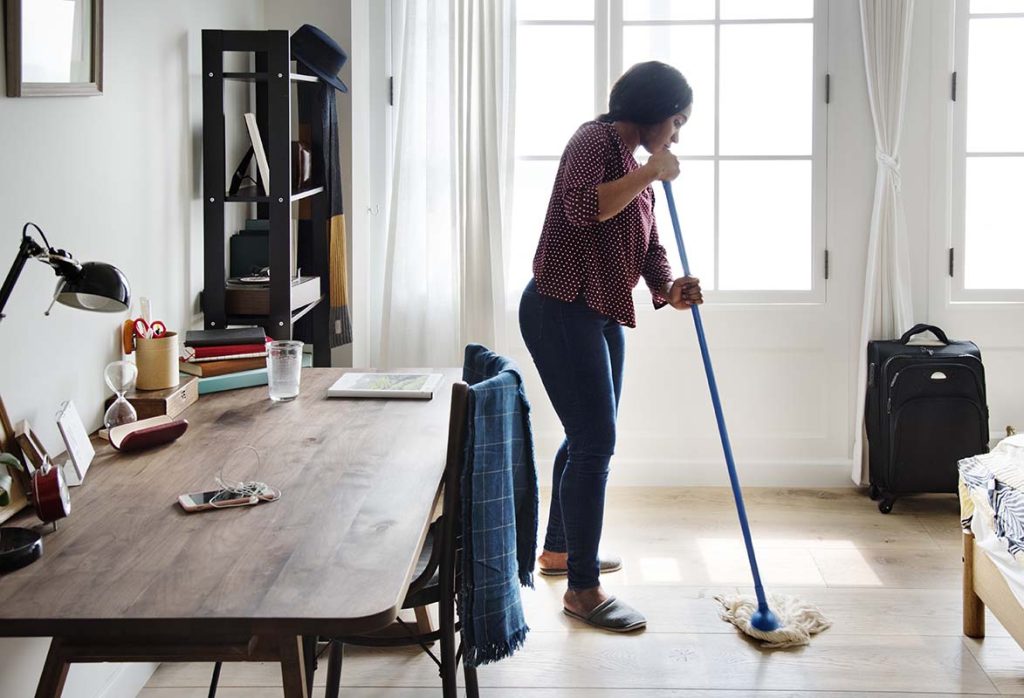
Flooring. Vacuum the kitchen floor to get rid of any dust, derbies and loose particles. Next, mop the floor using an appropriate floor cleaner to achieve a spotless finish. Don't forget to attend to the baseboards as well, ensuring every inch of your kitchen floor receives a thorough cleaning.
Living room cleaning checklist
Ceiling, walls and windows. Remove any picture frames or other decorations from the walls. Use a soft microfiber cloth to dust the ceiling and walls. Then wash the windows using a special cleaner, and don't forget to attend to the blinds if present. Moreover, remember to give the light fixtures and ceiling fans a thorough dusting to maintain their brilliance.
Furniture and upholstery. Dust all surfaces, including the coffee table, TV stand, and shelves, to improve the air quality of the space. Wipe them down with a damp cloth if needed. When attending to the couch and couch cushions, use the brush attachment on your vacuum cleaner to achieve a pristine appearance. If there are any stains on your sofa spot-clean them with an appropriate cleaner. If you have wooden furnishings, consider polishing them to restore their shine and remove any surface scratches. You can read our post on how to clean a fabric sofa for more help on that.
Flooring. Thoroughly vacuum or sweep the floor to remove dust, dirt, and debris. For a carpet refreshment, consider the wonders of baking soda – simply sprinkle it generously, allowing it to work its magic for approximately an hour, and then indulge in a thorough vacuuming session. If your living room has laminate or hardwood flooring then mop it with a floor cleaner (all-purpose cleaner may also work well). Also, remember to dust or wipe down baseboards throughout the living room.
Bathroom cleaning checklist
Walls, exhaust fan and vent covers. Wipe down any scuff marks or stains from the walls and bathroom tiles using a mild cleaning solution. Also, remember to tend to the air filters and exhaust fan – delicately dust them off and cleanse the cover to maintain their efficiency and appearance.
Shower, bathtub and toilet. Employ a tile or grout cleaner to effortlessly eliminate soap scum or mold from both the shower and bathtub. For limescale buildup on the showerhead, embrace the natural power of distilled white vinegar to restore its brilliance. Elevate the allure of glass shower doors with a gentle wipe-down, and don't forget to remove and wash shower curtains, if present. For the toilet, indulge in a thorough cleaning using a reliable toilet bowl cleaner. Use the toilet brush to quickly scrub the bowl. Also, be sure to polish the exterior of the toilet, including the handle and its surroundings.
Sink and countertop. Use a bathroom cleaner to clean the sink and faucet. Remove any soap scum or toothpaste stains. Wipe down the countertop with an appropriate cleaner to remove any residue.
Mirror and glass surfaces. Use a window cleaner to clean the mirror and make it streak-free. Be sure to clean any glass shelves or glass-covered cabinets.
Cabinets and drawers. Empty the cabinets and drawers and wipe down the interior surfaces.
Flooring. Remove all dust and debris from the bathroom floor. Wipe it down with a mop and a suitable floor cleaner.
Ceiling, walls and windows. Dust the ceilings and walls using a soft cloth. Use glass cleaner to clean windows, mirrors, and any other glass surfaces in the bedroom. Dust or vacuum blinds and wipe down any curtain rods or rails.
Furniture. Dust all furniture surfaces, including the bed frame, dresser, nightstands, and shelves. Wipe them down with a damp cloth if needed. Empty out the drawers and cabinets, and wipe them down with a mild all-purpose cleaner. If you have wooden items, consider polishing them to restore their shine and remove any surface scratches.
Mattress cleaning. Remove the bedding dust and thoroughly vacuum the entire surface of the mattress using the brush attachment. If there are any stains on the mattress, spot-clean them with mild liquid detergent and hot water. For a delightful scent, generously sprinkle baking soda across the mattress surface, allowing it to rest for at least 15 minutes (or longer, if possible) before conducting a thorough vacuuming session.
Closet. Meticulously empty the closet, ensuring no dirty clothes or belongings are left behind. Then wipe down the closet shelves and rods if needed.
Flooring. Thoroughly vacuum the carpet in your bedroom to remove dust, dirt, and debris. If you have hardwood, tile, or laminate floors, sweep and mop them with a suitable floor cleaner.
Carefully inspect all areas of the kitchen, living room, bathroom and bedroom to ensure everything has been cleaned and no personal items are left behind. Go through each area of your apartment one last time to check for any missed cleaning tasks.
Cleaning an apartment may seem daunting, but with the right strategy and following the checklist above you can leave the space in an excellent condition and get your full deposit back. If you find yourself uncertain about handling the job alone, don't hesitate to rely on professional end-of-tenancy cleaning services.
With skilled specialists at your side, your dirty apartment can swiftly be transformed into an illuminating space. This way you can save time for other essential tasks associated with your moving.
Trustindex verifies that the original source of the review is Google.
Skycleaners was my lucky search on the internet to have processional cleaning service of my property after the end of tenancy that my tenant left in very bad and dirty condition.
Good thing with sky cleaners is that they are well equipped and well skilled to understand and perform the deep cleaning service. 5 Star rating from me for the value for money service from sky cleaners and appreciate the hard working effort to ensure the customer happiness.
Thank you Sky cleaners! DEEPAK Gorane , Crawley
Giuseppe Di Pinto Grande
Trustindex verifies that the original source of the review is Google.
I am extremely satisfied with the cleaning services provided by this company! Their team is professional, thorough, and pays attention to every detail. My space has never looked so clean and fresh. I highly recommend them to anyone looking for reliable and high-quality cleaning services. Thank you for the amazing job! 😊
Will Beck
Trustindex verifies that the original source of the review is Google.
Second time I've used Skycleaners to come and deep-clean carpets in my flat, and I'm very happy. Great service at a fair price.
M ST
Trustindex verifies that the original source of the review is Google.
Yanka and Apostol came to do a full clean, including carpet and terrace. Very courteous and professional, did a great job and cleaned very well. Will call them again for regular carpet cleaning. Best prices and availability in London.
petar stefanov pstefanovvv@gmail.com
Trustindex verifies that the original source of the review is Google.
Really impressed with SkyCleaners! My home has never looked better. Great service and value—would definitely recommend!
Mira Markova
Trustindex verifies that the original source of the review is Google.
So far my favourite cleaning company !!! I tried so many other companies but Skycleaners are the best. Booking was easy and the cleaning was fantastic I’m using their service again and again. Thank you for making my life much easier!
Sahil Gugnani
Trustindex verifies that the original source of the review is Google.
There are very few cleaning companies that truly listen to your feedback, even after the cleaning is done, but this company is one of them. Angel is extremely cooperative and understanding. I highly recommend them to anyone looking for reliable and attentive cleaning services.
Mike Rogers (DuckMangler)
Trustindex verifies that the original source of the review is Google.
Absolutely first class service, the flat has never been cleaner. They were wonderfully flexible and understanding when I had to postpone my move.
Sook fun Soong
Trustindex verifies that the original source of the review is Google.
I recently hired Sky Cleaner Company and I couldn't be more impressed! From start to finish, they provided top-notch service. The owner, Angel, was extremely professional, friendly, and attentive to all of my needs. You can tell he truly cares about his customers and goes above and beyond to ensure satisfaction.
Their attention to detail was outstanding, and the entire team worked efficiently and thoroughly. What stood out most was the excellent customer service throughout the entire process. If you're ever not fully satisfied, they offer a 5-day warranty to fix any concerns, which gives you peace of mind.
Without a doubt, Sky Cleaner is the best company to choose if you're looking for quality cleaning with exceptional customer care. Highly recommend!"
Skycleaners Professional cleaning company operating since 2010
End of Tenancy Cleaning, Carpet Cleaning, After Builders Cleaning, Office Cleaning.